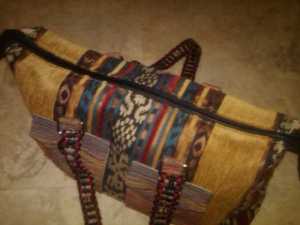
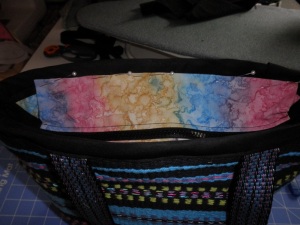
Can you ever have too many tote bags?  Of course not!  Depending on what you choose for size and fabric, this simple tote can be used for groceries, toys, knitting projects…well, you get the idea.
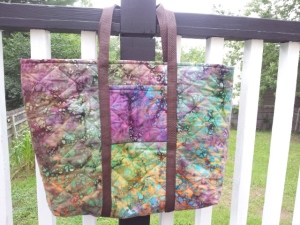
sew tote 3Fabric choices:  For the easiest project, buy pre-quilted fabric from your local sewing/craft store.  Your bag will have some firmness and a pretty contrasting lining.   For two good-size totes, I bought 1/2 yard of 60″ fabric.  Make sure to keep the design of the fabric in mind when purchasing.  I only needed 1/2 yard because I knew I could fold the 60″ piece, so I could cut two bags at 18 x 30.  If your fabric design runs obviously lengthwise on the fabric, you could buy 1 yard and make three bags cut 18 x 30, with a little fabric left over. (If that was too much math and you feel your head exploding, just buy 1/2 yard of 60″ fabric that doesn’t matter which way it goes and move on to the fun stuff.)

Straps:  Next, you can always make straps, but if you buy nylon or cotton webbing, your straps will be almost indestructible (except not puppy-proof — makes the perfect chew toy, just FYI).   Since I was making a large bag, I bought 4.5 yards of 1″ webbing for each bag.  Remember, it’s going to travel twice the height of your bag, plus enough for handles.

Gather your rulers, your scissors or rotary cutter, matching thread and turn on some tunes.  It’s SEW TIME!!

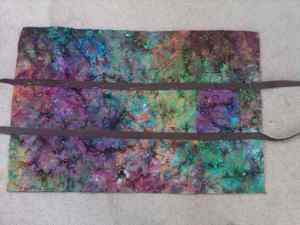
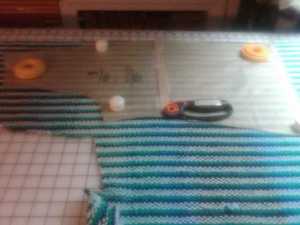
Cutting:  With the right side up, trim your fabric to the rectangle size you want.  Mine was 17″ x 28″ by the time I straightened out the edges.  Leave the fabric laying flat and mark the center points on all four sides.  (I use chalk or crayon.)  On the shorter sides, measure and make a mark at 3″ on either side of the center point.  Now take a long ruler, using those markings, draw a line from one end to the other of your piece.  You will be using this to line up your straps.  Look at pictures below to see why.

I decided to add a pocket and had some extra fabric, so I cut a 6″ x 7″ square of the prequilted fabric.

Edge finishing(I know, it’s weird to “finish” before you’ve even started.)  If you have a serger, you can “finish” all the edges by serging around both pieces with a three-thread edge.

On a traditional sewing machine, zig zag around the edges, letting your needle fall off the outside edge.  This is bulky fabric, and you’re going to have to hang on as you go around.  This doesn’t have to look perfect.  You’re just getting rid of the “hangy” threads and squishing the quilting together.  You can use a long pin, an awl, or your seam ripper held in your right hand, pressing the fabric into submission as it goes under the presser foot.

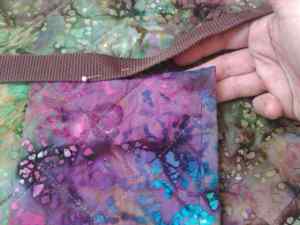
Optional pocket:  If you’re putting on a pocket — and I really think you’ll want to — now is the time to put it on.  If you’re using prequilted fabric, you might want to use the contrasting side as the outside of your pocket.  Either way, fold down 1″ (toward what you have chosen as the inside of your pocket) on one of the 6″ sides to make a hem and stitch across.  On your large rectangle, place the pocket where you want it to be — usually 3 or 4″ from the narrow end, centering it between your strap marks.  It should overlap the markings by about 1/2″ on either side.  Draw a placement line on your bag along the bottom of the pocket.  Now, flip the pocket down, so the bottom of pocket is on your placement line. Stitch across the pocket bottom, and then flip back up into place, enclosing your seam inside the pocket.  Put a pin in the center of the pocket for now so it stays lined up over strap markings.

StrapsDecision time.  Just for testing, safety pin your strapping into a large loop.  Lay your strap on your fabric, with the pinned piece where your hand will hold it.  (You won’t leave it like this later)  Then lining up the inside edge with your markings, pin the strap in a few places all around the bag.  Pick up your rectangle, fold it in half and try out the strap.  Adjust the pinned loop till you have the length you like.  Now, leaving the end of the strap pinned where you want the length, unpin your strap from the bag.  If you have a nylon strap, now that you know the exact length, you can cut it and fuse the ends over a flame. If it’s cotton, zigzag over ends.  Overlap and sew the ends of the loop together where you pinned it, being very careful not to twist the strap.    Hold the loop with the sewn part at one end and mark the opposite end of your loop.

Now you’re ready to seriously pin the strap to the bag.  Using the center markings as guides, place the sewn end and the opposite marked end at the center bottom of your bag, with the inside strap edge following along the strap markings. As you pin, think about how you are going to be putting the fabric through your machine and how easily you will be able to pull the pins. (Once you do it backwards, you’ll remember that step next time.)

Sew tote

Before you start stitching, pick up your bag, fold it in half and double-check that your handles are equal and that your pocket is sewn right side up.  (Yes, I have sewn a pocket upside down before. Your seam ripper will be your frenemy.)

Sew tote2

You’re almost there!  Sew close to both edges of the straps, stopping 2″ from the ends of your bag.  When you stop, leave your needle down, and turn the bag and sew across the top of the strap before continuing down the other edge of strap.  I even backspace across a couple times as this is the part of your strap that will need strength.  If you’re confident you can sew straight, you can use a thread that contrasts your strap for added detail.  If your sewing is still a little wonky, match the thread closely to the strap — a little darker shows less than a little lighter in matching thread.

After you’ve stopped to admire your wonderful sewing job, fold your bag in half, right sides together.  Lay it flat and pin both side edges.  I sew this part from the top to the bottom.  You can backstitch at the beginning of your seam, but it’s not terribly important because you’ll be hemming it in a second.

Hem top:  With the bag still wrong side out, fold over the top edge over one inch (toward what will be the bag’s inside) and pin.  You’ll be sewing around the top in a circle, so if your machine has a free arm, this is a good time to try it out.  Stitch around.

Squaring off bottomNow, we create a bottom to the bag, by squaring up the bottom corners.

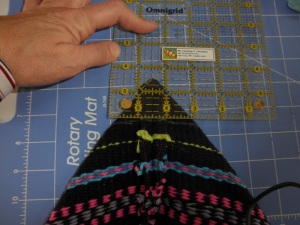
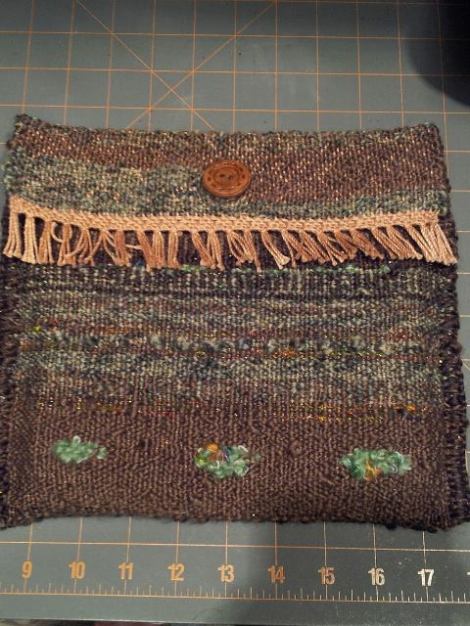
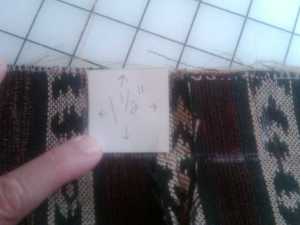
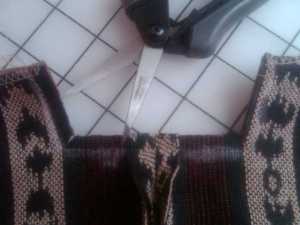
With the bag still inside out, lay bag down, and align one side seam with the center bottom of the bag.  This will create a triangle shape.  Draw a line across the base of the triangle.  Depending on the size of your bag, this could be 2-3″ long.  Pin and stitch across that line twice.  Repeat on opposite side.  I then cut the triangle point and serge or zigzag the edge.  Sometimes I take the point and tack it to my side seam. (Especially with my hand-woven fabrics.)

??????????????????????

Turn your bag right side out and do a happy dance! 


Sample drapery fabrics also make great totes and are often very inexpensive.  Recycled jeans are another great option. You might have to piece fabrics to get the right size, and you may also want to fuse or sew a piece of lining fabric to your rectangle depending on the weight of your exterior fabric.  If you choose to sew the lining on, just place the lining fabric and exterior pieces right sides together, sew around leaving a hole on the side for turning, then turn right side out, and top stitch over your opening.  Then follow directions above, skipping the “edge finishing.”  Your inner seams and top hems will be nicely finished when your bag is complete.

Make time today to make something beautiful!

These are so fun to make, I’m starting on my third case.  The first one is made with soft acrylic and sparkly novelty yarns, sett at 10 epi, using a mocha colored #3 crochet cotton.

Image

The second one is warped at 8 ends per inch (epi) also with #3 crochet cotton, but this time the weft is cotton (Peaches and Cream) in bright colors that really highlight the weft-faced patterns.  I wove each with a slit for a buttonhole in the flap.  I’m planning a strap woven with embroidery floss to match the cotton bag.

Image

I’ll be teaching beginning rigid heddle weaving at Fiber College of Maine on September 13th.  We’ll learn to direct warp the loom (quickly), and weave these weft-faced tablet covers. I’ll also demonstrate how to use a warping board, especially helpful for weaving plaids and planning multi-colored and long warp designs.  It is just one of many fiber-oriented classes held every fall.  The classes are always fun and unique. If that weren’t enough, they’re held at beautiful Searsport Shores Ocean Campground. For more information, check out http://www.fibercollege.org.

Perfectly confident people often panic when they hear the word “zipper” in reference to a sewing project.  I have stooped to hiding any mention of a zipper in my beginning sewing classes, knowing it will scare students away.  When I have them captive in my class, they have no choice but to sit and sew.  Happily, every student left with a perfectly placed zipper and new-found confidence in their design abilities.  There are many super-easy zipper techniques.  I hope the following instructions cure your zipper fears while you make a tote with a zippered closure in the top.

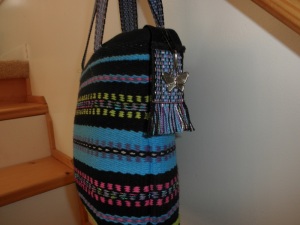
These are examples of two bags of different sizes using the same zippered closure.  In one, the zipper is sewn directly to the bag fabric, while the other was sewn to coordinating fabrics and then sewn to the bag. Both are simple!  I’ll explain how to insert the zipper on the right.
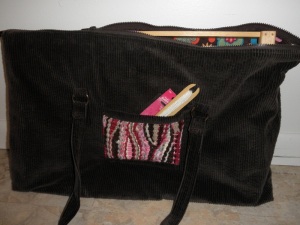
Zippered tote for Inkle Loom

Easy zipper top closure

In either project, I start with a zipper that is at least four inches LONGER than the width of your bag. The ends of the zipper will be hanging over the edge of your bag just a little and you want room for tabs on either end. Also, the added length is necessary for you to open your bag as fully as possible to access the treasures within. (And yes, I learned this the hard way. The bag on the left needed a new zipper — this one was too short.)

For the custom Inkle Loom Bag on the right, I cut two rectangles of fabric, one upholstery sample and one of poplin. If you want to put pockets on the bags, do this before the next step. When designing a bag for a specific purpose, take into consideration that the boxed bottom will create sides in your bag. Therefore, measure the anticipated width as well as the length of your bag.  The wider the ends, the more width you need to add.  I usually add three inches for an average bag.

Treating each fabric separately, fold each in half, right sides together, and sew up the sides.

For boxed bottom:  Lay side seam down toward center bottom of bag and mark 3″ triangle across bottom of side seam. Sew across triangle, then sew again next to first stitching (for strength). Trim off excess. (Repeat for lining)

Mark across side seam, pin and stitch.

Place bag inside the lining section, right sides together. Match up side seams. (You should have seams showing on the inside of bag and outside of lining as you pin.) Lay seam flat and mark 1.5″ x 3″ rectangle across seam line. Use whatever shows well — If you don’t have tailor’s chalk, use a crayon, pen — it’s not going to show later.

Measure twice, cut once.

Marking with chalk — or crayon

Sew around the two rectangles you have marked. Trim away rectangle and clip corners.

Turn bag right side out and press. Topstitch around the little U-shapes and zizag or serge around the raw edges at the top of bag — these are what I’ll call the bag flaps.

Trim and snip to corner

Snip to corners so edges won’t pucker

turn and press

Turn bag right side out, press, topstitch and zigzag/serge raw edges

Yes, it’s ZIPPER TIME!!!! Turn the bag wrong side out again. Keeping the bag to your left, turn the zipper face down and center the zipper on the right side of the bag flap, with the zipper tape lined up to edge of flap and zipper toward inside of bag. Pin and stitch in center of tape.

Finally the zipper

Centering zipper across the flap, face down on right side.

Pin and stitch in center of zipper tape, keeping edge of bag even with tape.

Now, flip the bag around so the other bag flap is on the table and again pin the zipper face down, centered on the flap. You’re almost there!!!

Other side

Pin the opposite side, keeping bag ends even.

Turn the bag right side out and open the zipper. Fold the zipper tape to the inside and topstitch along edge of bag. Repeat for other side of zipper.

topstitching

Fold zippered edge to inside, pin and topstich edge from right side.

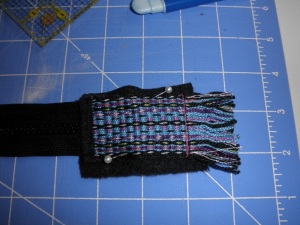
Now the ends. I usually choose felt or polyester fleece (neither of which fray) for my tabs. I cut two pieces of felt for each tab about 2″ square. Mark a curved end if you wish or a simple rectangle or square. Center the zipper end inside tab and stitch straight across the zipper ends. Trim the zipper so ends will be contained within the tab. Then topstitch around your tab in whichever shape you like, curved or rectangular. Trim close to stitching.

tabs

Add a tab with non-fray felt or fleece.

Tabs using leftover inkle woven strap backed with felt

Enjoy your zippered tote/purse. But beware, all your friends will want you to make one for them!

Adding a zipper to existing tote: 

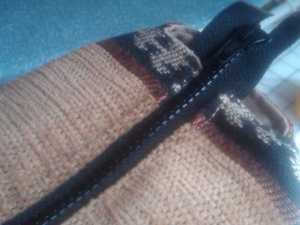
In answer to a question, I wanted to add instructions to add a simple zipper to an existing bag.  This is shown in the picture at the top of this posting and I only briefly mentioned how to do it.

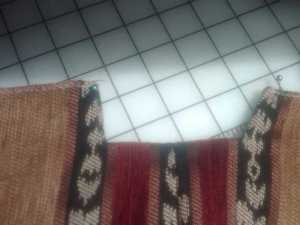
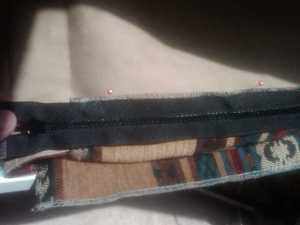
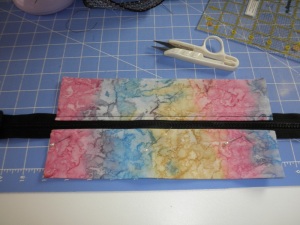
Using coordinating fabrics, cut two rectangles the length of your bag’s bottom plus 1 1/4″ for seam allowances, and four inches wide.  Fuse interfacing to the back of both.  Fold right sides together lengthwise and sew just across ends.  Turn and press.  Now finish raw edges with zigzag or serger.   (I also turn them under 1/4″ and press.)??????????????????????

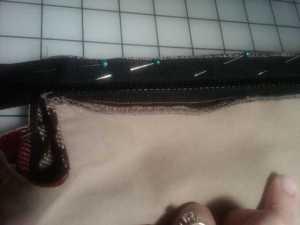
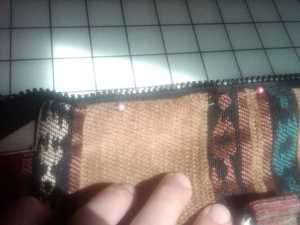
Place folded edge over zipper tape, centering zipper, and pin.  Stitch, then repeat on other side of zipper. Depending on your bag, you can also place the fold to the outside, stitch and flip the rectangles and topstitch them as shown below.  Apply tabs to the ends.

OLYMPUS DIGITAL CAMERA


There are a couple ways to sew this to your bag.  Here is the simplest:  Center one side panel onto the inside edge of your bag, and stitch about 1/4″ from the edge. Repeat on opposite side.  If you don’t want to see the serged/zigzagged edge, you can fold it under 1/4″ before stitching.    I hope this is helpful.  Please keep your questions coming.

??????????????????????


Many weavers begin weaving to create one-of-a-kind cloth.  However, once it’s woven, they’re paralyzed with fear at the prospect of cutting into their beautiful creation.    I can relate.

After traveling to Uruguay for my son’s wedding, I pulled out the beautiful single-ply handspun cotton I had purchased.  It was dyed in shades ranging from charcoal through deep blue, teal, to a light blue-green.  I was afraid it wouldn’t be strong enough for warp and I agonized over that revelation for a couple weeks.  Every so often, I would pick up the yarn, drool over the color changes, and yank on it.   The strand broke and I would retreat back into panic mode.

After several more weeks of this seeming inaction, I spied my cones of cotton I had collected for various placemat and potholder projects.  I chose four colors that were very close to the Uruguayan cotton and decided that would be my warp.

Tying on the warp.

Now, having a plan, I was energized.  I looked at jacket patterns and decided I needed about 2.5 yards of fabric.  I thought, well, I’m about 40″ wide at my widest, so half of that is 20.”  If I weave a length for the back, another length for the front (which I’d split in two), and another for the sleeves, I should be all set.  (Wrong, but more on that later.)

I happily flipped my loom over to the warping board and measured out 3 yards each in a repeating “navy, teal, cream and light blue” pattern for the 24″ loom width at 8 ends per inch.  I had “yarn bunches” hanging from my floor lamp for a few days just so I could enjoy my accomplishment.

I warped and wound the yarn on the loom when I had a day to myself, and happily began weaving with the beloved yarn from Uruguay.  I wove two and half yards of fabric and cut it from the loom.  I loved it.  I washed it.  I dried it.  I pulled it from the dryer and realized it had shrunk at least a foot.  I got out prospective patterns and realized my calculations were way off.  After several days of consternation, I re-warped the loom and wove another two and half yards.

Machine washed and dried

After washing and drying, I ended up with almost four yards at 22″ wide.  I hung it from my clothesline just to admire the length. 
After admiring it for a while, I folded it carefully and placed it on my cutting table.  I gathered up my patterns and tried to find a simple jacket pattern–no princess seams, no darts, no dropped shoulders.  Since it is pretty thick fabric, I didn’t want the bulk under my arms from a less fitted style.  However, fitted garments have to fit to meet under your arms.  Therefore, the pieces are WIDER.  I couldn’t find a pattern that would fit on my yardage.  I started to consider making it into a tablecloth.  I draped it like a sarape and checked my reflection.  Not good.  The tablecloth idea was gaining momentum.  I set the cloth aside, again.  I decided the worst that could happen is it would be an ugly garment, but at least I would have gained the knowledge in attempting to make a garment from my handwoven cloth.
I found that I could lay out the pattern in either direction as it was an even weave, just as long as I kept track of the stripes.  I even had enough left to add pockets.
I precut the pattern tissue so I could easily use the rotary cutter.  The rotary cutter is so sharp it minimizes the movement of the cloth while cutting.  After each piece was cut, I carefully lifted the pieces and brought them to my serger and finished all seam allowances with a three-thread overlocking stitch.
  Once all the pieces were cut, I pinned pieces together for a trial fitting.  No adjustments were needed, so I began sewing.  After sewing the shoulder seams, I put the jacket on my dressform and auditioned some bias tape for enclosing the back neck and front edges.  I decided to machine embroider the tape to bring in the colors of the weaving.

Variegated quilting thread was embroidered onto the tape.

I tried several different stitches on my sewing machine before deciding on one that would not detract from the strong stripes, but would add a little softness to the design.
After sewing on the edging, I had enough left to use as pocket embellishment.  I sewed on the pockets and then was ready to finish jacket construction.  At this point, I had lost all the fear and was looking forward to a finished project.
The sleeves were sewn on flat, laying the front and jacket out flat and centering the top of sleeve at the shoulder seam.  I pressed the hem of the sleeves and jacket before sewing the final seams.  The last seam was sewn up the jacket side and down the sleeve.  I turned the hems where I had previously pressed and machine stitched them in place.
The finished garment. 

Handwoven fabric to finished jacket!

Traditional rug hooking uses a tool much like a crochet hook to pull narrow strips of fabric (usually felted wool) through a backing forming loops on the front.  Depending on your design and the purpose of the finished object, different width strips are used, as well as different backing fabrics.  If you visit Campobello Island, you will see many hooked rugs decorating the Roosevelt family’s summer home.  They were hooked on a burlap backing and have survived despite the damp and hard wear they were subjected to with a large family enjoying their summer home. 

 Today, most rug hookers prefer a linen weave.  It is softer to work with, stronger, durable, and has a more uniform weave than burlap.  Another great backing that is very popular is a high quality monk’s cloth.  This is very soft and makes wonderful pillows, bags, as well as rugs.  Be sure to buy the best quality monk’s cloth, as the cheaper quality, while it is fine for Swedish weaving, is not usually a strong enough weave for rug hooking. 

Hand-drawn pine cones and needles

Designs vary from primitive to almost photographic in detail.  Most start with primitive or geometric designs to get the rhythm of pulling loops of uniform size and learning to outline and fill your design.  It is a good way to learn what you like.  I have seen some students say, “I don’t like primitive,” and instead start with a very delicate fine floral design.  They usually get discouraged and never finish their first project.  It would be akin to doing an Aran sweater for your first knitting project.   

My first hooking project was a simple sunflower design.  It made me get used to making curved lines and was almost like coloring, in that I learned to outline an area and then fill it in.  After that, I was “hooked.”   I would advise buying your first project from a rug hooking shop.  They will guide you to a good beginner project.  Find one that you love; you will be more likely to finish it.  

After my first project, I realized I could design my own with a magic marker and some graph paper.  Once I liked the design, I drew it with the marker directly on my backing fabric.  I am attaching a picture of my first design done in wool on Scottish linen.  I like doing small projects when I am learning a new craft as it gives me a sense of accomplishment and encouragement.

Primitive design lets you exercise "artistic license."


This landscape design is only 11 x 16 inches and was a fun first design project. If you don’t like elements of your design, you simple pull it out and re-do in another color, change the design, and keep hooking!

Notice the fact that I’ve used lighter colors in the shady spots, which doesn’t make any sense, but that’s what’s fun about primitive art–you can disobey the rules!

Note the swirling sky versus the plain field.

I love designing for the seasons, so my next design was a fall wall-hanging featuring the traditional crow and pumpkin motifs.  I try to create a frame/border for my designs.  I also consider motion.  Note that the sky behind the crow is swirling, while the field is done in straight rows.  The pumpkin was done in rounded rows to give the illusion of the globe.  These choices as well as choosing fabric colors are all creative opportunities for the artist. 

Most of my wool is purchased at rug hooking shops, but you can also find wool skirts and jackets at yard sales, resale shops, and antique shops.  Just be sure to wash them in hot water, dry them in the dryer (so they felt well), and you don’t infect your wool stash with little hitchhikers.  I store my wool with lavender packets–as effective as mothballs, but not stinky.

Another purchase I made shortly after beginning rug hooking was a rug frame.  One of the few items to survive our house fire, my frame is a simple design. There are many kinds at many prices.  Usually, you can sell your “beginner” frame when you decide you want something more elaborate, but I would save money on the fancy frame and buy a “cutter” first.  The cutters are rather expensive but worth every penny.  You simply crank a handle and the cutter cuts your wool into three strips (simultaneously) of whichever size you need.  It’s amazingly fast and accurate.  I have several cutter blades so I can cut different size strips. 


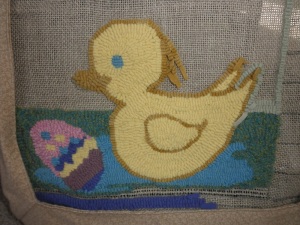
Easter design on linen. Note frame cover.

Here my Easter wallhanging is on my frame.  The frames have very sharp teeth on the edges that holds the backing taut (like the teeth on wool carders).  I have a flannel cover over the frame’s edges, so I don’t get scratched. 
Also, note the row near the bottom of the design where I have “reverse hooked.”  This means I wasn’t happy with my design and I pulled out the loops.  Sometimes I will pull out an entire section and re-hook in a completely different color. 
I hope I have inspired or encouraged you to try your hand at rug hooking.  Enjoy!   
 
PS:  The ice has still not gone out at Pushaw Lake.

I’m ignoring the forecast for 10 inches of snow for the weekend.  However, I’m not jinxing things by packing away the snow shovels or cross-country skies.  Brilliant blue skies sprinkled with tiny cotton ball clouds are the backdrop for my weaving session today.   The rigid heddle loom is set up with a view of the newly arrived mourning doves and a huge woodpecker which is tearing through a “widowmaker” sending wood chips flying.  Even the crows are used to me sitting at my loom and don’t flinch at my passing the shuttles back and forth.  The lake is still covered with ice, but I can hear the grinding and cracking from across the street.  Every day, the noise of the birds increases.  When the loons arrive, I’ll know the ice has “gone out.”  

My handwoven fabric from Uruguayan/American cotton yarns.

Earlier this week, I finished weaving another two yards of fabric on the rigid heddle for my spring jacket project.  It was woven with single-ply cotton handspun yarn from Uruguay as the weft and commercial Sugar and Cream cotton yarn as the stronger warp.    The fabric shrunk so much that my initial warp of 2.5 yards became less than two yards finished! 

The project on the rigid heddle loom today is a weft-faced cotton cloth which matches a strap woven on the inkle loom.  My granddaughter, Lexi, has claimed the finished tote and chose the pink and purple yarns.

I have been distracted from my weaving looms by another form of weaving, Kumihimo braiding, to which a friend recently introduced me.   Since then, I’ve enjoyed making numerous necklaces and bracelets — but that’s for another posting!

I'm weaving Lexi a totebag to match the inkle woven strap.


Home décor always makes a personal statement. Your decorating choices (or lack thereof) reflect you and your family. If you’re a creative, albeit amateur, interior designer like me, you’ve painted and tiled, made custom throws, quilts, curtains, placemats, and pillows. What’s missing your signature?  Look down. Hardwood, laminate, and ceramic tile flooring have replaced wall-to-wall carpets in many homes. These easy-care floor coverings are great with kids and pets, they’re hypoallergenic, and they enable you to add a little color through inexpensive throw rugs. 

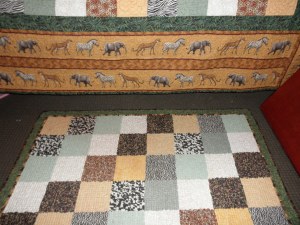
Custom bedside rug made to match a child's quilt
Mimic your custom quilt using the same fabrics and geometric design.
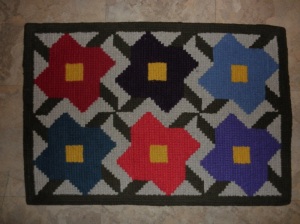
Soft underfoot this rug is made from non-fraying polyester fleece.


 Like custom window-treatments, custom rugs are available, but prohibitively expensive.  If you’ve gone to the trouble of creating custom draperies and/or quilts, you’re choosy about what you put in your room. My solution?  Make rugs to match your quilts or décor! 

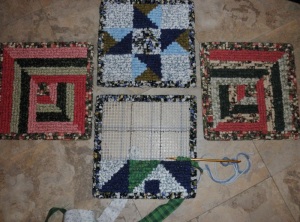
 The techniques are many, but one I’ve found the easiest for anyone to learn is locker-hooking with fabric onto the gridded backing used for latch-hook rugs.  The locker-hook has a yarn-needle-size hole on one end and a crochet-type hook on the other.  Approximately one-inch width strips of cotton, fleece, and even bulky-weight yarn is pulled up through the holes in the canvas, creating small loops. These are kept in place by cotton yarn which is pulled through the loops.  Both steps are accomplished with the locker-hook. 
  
 Hot pads are quick projects to customize your table settings.

    Creating the designs is as easy as drawing on graph paper. In fact, that’s how I design all my rugs. For your first project, I recommend using a tried and true pattern. Then when you’re comfortable, try adapting quilt block or geometric patterns.  Starting with small projects like cotton hot pads gave my students the confidence to design larger rugs.  I’ve hooked bedside rugs with cotton fabric to match quilts and polyester fleece leftover from sewing projects.   My hotpads are made using the same fabric as the kitchen curtains.

I hope you’ve been inspired to feather your nest, and I look forward to hearing about your creative endeavors!

Like most artists, I am inspired by the seasons and view outside my windows.  Today, the temperature outside is only 34, but the sunshine warmed the glassed-in porch to 70!   I’m heading out with my inkle loom to work on a March Weave-Along project. 

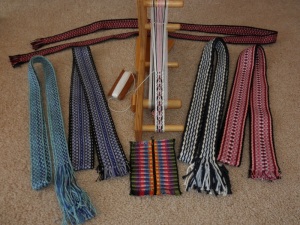
Inkle bands

My inkle loom with assorted bands for bag handles and belts.

The inkle is a great take-along loom that comes in large and small sizes.  The warp yarn makes the design while the weft is virtually invisible.   The design on the loom in this picture shows a pickup technique which adds an incredible amount of variety to the weaving.
In addition to keeping busy on my inkle loom, I’ve dusted off the tapestry loom.  It’s also very portable to enable me to get out and enjoy the sunshine. 

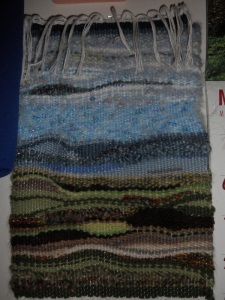
Kings Mountain - Tapestry weaving

Multi-textured yarn creates dimension in this tapestry.

Unlike the inkle, the tapestry loom’s design is almost entirely weft-based and the warp yarn is invisible.  It’s also a great place to use textured yarns.  This little tapestry wallhanging is my first project off this loom.   Landscape designs are very freeing and require very little advance planning.   I just grabbed bits and pieces of yarn in colors for earth, water and sky, put them in a zippered plastic bag and took colors as the mood struck me.  It’s also easy to remove a color you dislike as you weave.  A wide-toothed comb is used to “beat” the weft tightly to cover the warp yarns.

Another use of my tapestry loom is in making small tapestries for pockets in totebags.  Who has enough totes anyway?  I made this tote from my fabric and yarn stash.  The brown corduroy, lined with wild cotton, made a large tote which adds very little to the weight of the loom and the supplies inside. 
Tapestry Loom Totebag

A woven tapestry pocket hints at what's inside.

 I wove the small pocket from variegated pink/brown yarn and added bits of textured cream and pink acrylic, and some brown suede and pink ribbon accents.
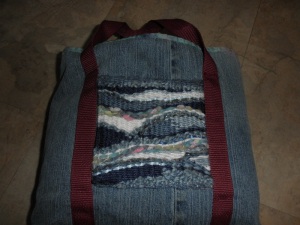
Knitting bag with woven pocket

Recycled denim and leftover yarn make a fun bag.

Another smaller tote was made from recycled jeans and nylon webbing for handles.  The pocket was woven using tapestry techniques on a pin-weaving loom I made from recycled cardboard, batting and muslin.
 
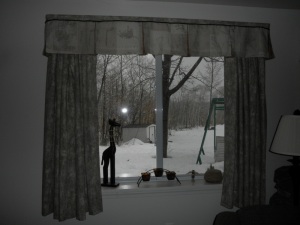
Pleated valance over ctr pull drapes
Pleated valance covers center pull drapery rod

Spring fever makes you want to re-feather the nest, open the windows, let the sunshine and fresh air in.  It also makes you look at your surroundings with an eye toward change.  If you live in the South, window coverings lower air conditioning costs.  Up here in Maine, window coverings not only save on heat in the long winter nights, but help with fading of your furniture and radiant heat on those long summer days.  Some people just want drapes to give them privacy and security from neighbors and passersby.  Others just want a pop of color or a design opportunity.  Whatever your reason, custom curtains/draperies you sew yourself are an affordable way to enhance your surroundings.  

I’ve attached photos of the window treatments I’ve designed for my home in Maine.  I wanted drapes that were easy to open and close to take advantage of the view and wonderful sunshine, but close off at night or in winter.  What I saved in buying fabric at warehouse prices, I put into buying good quality hardware.  For the side pull and center pull draperies, which are made from heavy drapery fabrics, I needed the extra strength only heavy-duty drapery hardware can supply.  

All my curtains and draperies are lined.  The lining not only gives extra insulation, but protects the fabrics from fading.  All but the heavy-weight drapery fabric was prewashed and dried before cutting to enable me to care for the finished curtains the same way.

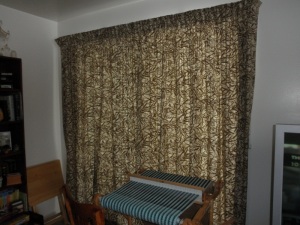
Lined center-pull draperies

The lightweight curtains and valances all have rod pockets, while the heavy draperies are made with pre-made drapery tape sewn at the top.  One draperty tape (available at any sewing shop) allows the drape to be gathered using four-prong hooks inserted in the tape which gives you the top gathers.  After the tape is gathered with the hook, I tack the pleat tightly either by hand or machine.  Another sew-on tape has strings running along the length, which you pull to gather the drape softly and tie off at either end.

Another trick for quick and easy two-color treatments is the attached valance shown on the door curtain and shower curtain.  The contrast-fabric valance is sewn to the top of the curtain (right side of valance to wrong side of curtain), flip valance to right side of curtain. Depending on your preference, you can sew rod pocket only in folded valance (make sure you’ve made valance fabric long enough to do this) or make pocket between valance and pocket fabric. 

Standard one inch curtain rods require a 1 1/2″ rod pocket, to enable curtain to move easily over rod.  I usually hem curtains at 2 1/2 to 3″ to allow the weight of the hem to keep the curtain hanging straight.


Great for sliding door.

The three-prong tape makes it easy.


I know sometimes you just want a simple, easy to sew, easy to care for, inexpensive curtain in colors or fabric you can’t find in ready-made.  This is when you go to the cotton fabrics, prewash and dry before measuring and cutting.  These are simple rectangles with 1″ side hems, 2 1/2″ top hems (with 1 1/2 rod pocket) and 2 1/2 ” bottom hems.  You can use one fabric for the panels and a coordinating fabric for valances or get really creative with a pieced fabric treatment.

Get the fabric you want by piecing it yourself!

A more simple version is made using “border fabric” using one section for valance and another for panel.
Weaving in Progress

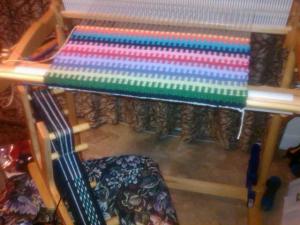
Weaving on the Rigid Heddle and Inkle looms

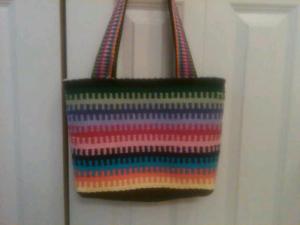
Rainbow Tote
Woven on Rigid Heddle and Inkle Loom

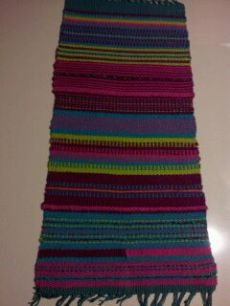
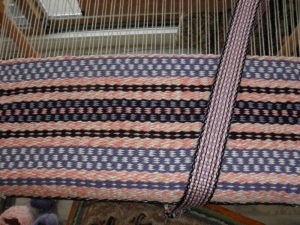
I’ve been busy weaving while the snow’s been falling this January.  This tote idea began with the strap.  I wove Perle Cotton in bright colors on my inkle loom (which is a warp-faced weave).  Then I wanted to make fabric to match out of a heavier weight yarn.  I warped my rigid heddle loom with strong cotton warp (#3) at 5 epi (skipped every other slot on a 10 epi heddle), and designed a weft-faced weave in coordinating colors.  The weft is Peaches & Creme cotton purchased at Wal-Mart.  I used a wide-tooth comb to beat the weft tightly.

I hemed both ends of the weaving with a zig-zag stitch, then folded the bag in half and sewed up the sides.  I folded the side down, aligning the side seam with the bottom’s center line, making a triangle in each side bottom, sewing across the triangle to square up the base of the bag. 

The straps were sewed first with the raw edge toward the top of the bag, then I pinned 1/2″ seam binding around the entire raw edge of the bag top hem, catching the straps and stitched around.  The straps were lifted up out of the bag and stitched again along the top edge of the seam binding to give the straps extra strength.

I’m making a removable liner with pockets, which I can use in this bag and the others I am in the process of weaving.  The liner has an added benefit of giving the soft bag more structure.

Happy crafting during these remaining winter months!